- Swords & Souls Neverseen – Гайд по игре
- Основные данные
- Лагерь (Тренировочная площадка)
- Музей
- Информация о персонаже
- Аквариум и рыбалка
- Swords & Souls: Neverseen — Basic Guide
- Basic Information
- Character Information
- Aquarium and Fishing
- Swords & Souls: Neverseen — 100% Achievement Guide (How to Unlock All)
- True Soul Master
- Juggler Master
- Soul Heart
- Bosses
- Fishing
- Fisherman’s Horizon
- Oof Ring
- Taming
- Okay, Let’s Play!
- Short Version
- Long Version
- Endless Mode
- Carved History
Swords & Souls Neverseen – Гайд по игре
В этом руководстве приведена основная информация об игре, в нем также рассматриваются некоторые малоизвестные дополнительные возможности. Цель гайда – помочь прояснить некоторые моменты, недостаточно четко указанные в игре, в связи с чем их легко можно упустить из виду.
Основные данные
Лагерь (Тренировочная площадка)

Модернизация Лагеря позволяет увеличивать количество характеристик, которые можно получить каждый раз при заполнении шкалы индикатора в ходе тренировок.

- Крестик (X) – нормальное комбо.
- Звезда – звездное комбо.
- Галочка – миссия игрока.

При постройке дома у игрока увеличивается количество опыта (XP), которое он получает из каждого источника.
Музей

Можно вложить инвестиции в Музей, чтобы повысить приносимые им доходы. На доход влияет множество факторов, как показано на изображении выше.
- Арсенал – коллекция Экипировки и Оружия.
- Трофеи – тренировочные медали и награды, полученные во время тренировок.
- Галерея – расширение галереи происходит за счет всех уникальных противников, с которыми сталкивается игрок.
- Аквариум – в него добавляется каждая уникальная рыба, пойманная в течении игры. Также имеется опция сбора максимального количества каждого вида рыбы.
Во время игры можно случайно получить клевер (clovers). Он может выпасть во время тренировок или боя. Клевер может дропнуться даже из самого Муши (Mushy). Им нужно накормить Муши в Музее, для того чтобы получить одну из случайных наград:
- Деньги.
- Опыт.
- Купоны на бесплатные зелья или лакомства.
- Усилители статов (если повезет, можно получить огромное количество).
- И даже новый клевер.

Чем чаще персонаж нанимает соратников, тем выше становится их репутация. В конце концов они становятся друзьями. Чем лучше отношение соратников к игроку, тем больше скиллов у них откроется. Хотя они нанимаются на несколько битв, через некоторое время соратники обновляются и могут быть наняты снова.
Информация о персонаже
Независимо от количества вложенных во время повышения уровня очков, следующие характеристики (статы) персонажа будут максимальными:
- Вероятность броска – 40%.
- Бонусы на восстановление заклинания души – 200%.
- Перезарядка уклонения – 20 с.
- Восстановление блока – 20 с.
Можно сбрасывать свои навыки сколько угодно, причем бесплатно.
Аквариум и рыбалка
Каждая локация для рыбалки имеет 3 раритета: Обычный, Редкий и Уникальный.
- В ходе рыбалки, чем дальше заброшена леска, тем выше шансы добыть редкую рыбу.
- Леску будет легче намотать, если сделать это сразу после клева.
Как уже упоминалось выше, по мере заполнения аквариума увеличивается процент доходов с вложения в Музей.
- При ловле рубиновой форели к шкале аквариума добавляется 7 единиц.
- Алмазный окунь приносит 4 единицы.
- Цветок добавляет 4 единицы.
- Бонус от Жала Рифа составляет 5 единиц.
Swords & Souls: Neverseen — Basic Guide
This guide contacts basic information as well as some things you might not have known. Its intent is to help clarify a few things that aren’t clearly shown in game or easy to overlook!
Basic Information
Camp (aka Training Area)
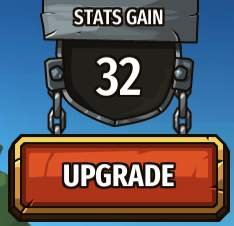
Upgrading the Camp will allow you to increase the amount of stats you gain each time you fill the bar in training.
- The X is for Normal Combo.
- The Star is your Star Combo.
- The Check Mark is your Mission.
House
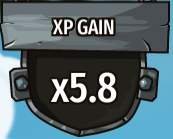
As you build up your house, you will increase the amount of XP you gain from every source.
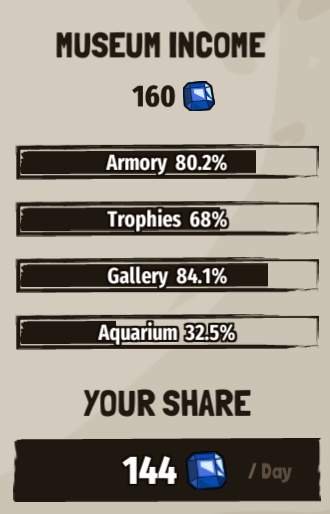
You can invest in the register to upgrade your Museum income. It is effected by multiple things as shown above.
- Armory — Collection of Gear and Weapons.
- Trophies — This is training medals and trophies
- Gallery — Each unique enemy you encounter adds a new entry to the gallery.
- Aquarium — Each unique fish adds to this, as well as collecting the maximum of each fish.

Throughout the game you will get clovers randomly. These can drop from training, combat, or even Mushy himself. You can use these clovers to feed to Mushy in the Museum, doing so he will drop you random things!
- Money.
- Exp.
- Coupons for free potions or pet treats.
- Stat Increases (these can even crit and give you a massive amount).
- More clovers!

The more you hire companions, their standing towards you will increase. Eventually they will become your friends. The more they like you, the more skills they unlock. Though they only last a few encounters, they refresh and can be hired again.
Character Information
Certain Stats will max out, no matter how many points you put in to level up.
- Throw chance — 40%.
- Soulcery Cooldown Bonus — 200%.
- Block Cooldown — 20 s.
- Dodge Cooldown — 20 s.
You can reset your skills as often as you want free of charge.
Aquarium and Fishing
Each fishing spot has 3 rarities, Common, Uncommon, and Rare.
- While fishing, the further out you cast the line, the higher percent to catch a rare fish.
- The quicker reaction on a bite, the easier it is to reel in.
As mentioned above, your aquarium progress increases the percent you can gain per day for your museum investments.
- Ruby Trout — Can add 7 to your aquarium.
- Diamond Bass — Can add 4.
- Bloobler — Can add 4.
- Reef Stinger — Can add 5.
Swords & Souls: Neverseen — 100% Achievement Guide (How to Unlock All)

How to obtain every achievement in a game that makes you grind for everything.
True Soul Master
Get three Combo medals of rank Wood
Get three Combo medals of rank Bronze
Get three Combo medals of rank Silver
Get three Combo medals of rank Gold
Get three Combo medals of rank Platinum
Soul Master Disciple
Get three Combo medals of rank Soul Master
True Soul Master
Get all Soul Master medals in all training areas
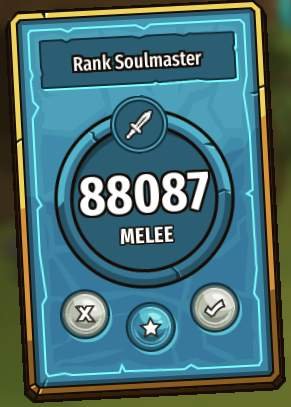
In order to achieve these, you must get a total of three Combo medals. You can only achieve one per training area, which means you will have to get Combo medals in three different areas of training. Shown below is a screenshot of where you can find this medal.
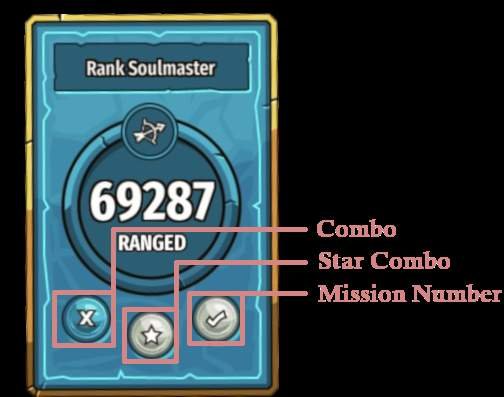
Keep in mind, the medal icons presented on the card match the same icons you will see when you are in the training mini-game. Meaning, you will find the Combo medal on the left side of the screen, the Mission medal at the bottom left, and the Star Combo medal on the right side while training.
Juggler Master
Juggle with the same coin 10 times
Juggle with the same coin 20 times
Juggle with the same coin 30 times
This is best done on a brand new save.
The more you train your archery, the more difficult the mini-game will become. This includes spinning targets and moving obstacles. When you are just starting out, the only thing that pops-up are stationary targets which is why this is best done on a new save.
When you attempt this achievement, make sure that you do not back out of the archery training mini-game. Doing so will result in all that experience being added to your medals and card itself. Upgrading the card will create a more difficult experience for you.
General tips are relatively simple. Attempt this when you have no combo as a higher combo will make the targets come out faster. Furthermore, be sure to slowly hit the coin. Shooting it fast will result in it coming down from off-screen faster than you can anticipate.
Soul Heart
Become friends with a mercenary
Become friends with two mercenaries
Soul Heart
Become friends with all mercenaries
Going to the tavern, you’ll be able to hire three different mercenaries to battle with you for two missions. After this, they will rest for a week. However, we can move the days forward through either completing another mission or training for a certain period of time.
All you have to do is keep adding them to your roster whenever they pop up. You should always have the money for them so long as you’re not flippantly spending at the market. Keep fighting and they should raise their reputation over time.
Bosses
These are all self-explanatory. So long as you clear the entire map, you’ll get every achievement listed here. There will be a section dedicated to the hardest boss in the game on Chapter 6 alongside the proper way of achieving a victory against them with beginner armor and weaponry
Defeat the Mama Mole
Defeat the Legendary Hunters
Defeat chapter 1 boss
Defeat chapter 2 boss
Defeat chapter 3 boss
Ship Sinker
Defeat chapter 4 boss
Defeat chapter 5 boss
Defeat chapter 6 boss
Fishing
There are six total fishing spots in the game indicated by the small fish-like sign on the world map. Go to these locations (preferably with the last fishing rod) and get all the fish. You’ll want to 100% each area by getting the corresponding fish for the Museum Completion achievement.
Catch 3 different types of fish
Catch 8 different types of fish
Catch 11 different types of fish
For this achievement, you simply have to click fast enough to get perfect. You do not need to actually catch the fish. Toss your rod in and keep trying until you get it. It can feel tricky but you’ll get the timing down soon enough.
Fisherman’s Horizon
Get 3 perfect in a row while fishing
Oof Ring
You should get this ring early on from a chest or the market. I don’t remember where I received it but all you have to do is equip the ring and die in combat. It’ll save you from death one time and the achievement will pop. Simple!
Trigger the Oof ring once
Taming
There are eleven pets in total. However, there are variations that need to be tamed.
- Moskito
- Mostingo
- Mole
- Dark Mole
- Woulfy
- Snoofy
- Zuby
- Wild Mushy
- Krab
- Stumpy
- Turgon
If you are missing them, you can view them in the third cave present in the Museum. It will show all of the enemies that you’ve killed, including the animals that are currently able to be tamed. Still having trouble? I’ve created a world map where you can find all of them at the bottom of this section.
Hi-Res image of map.

The notes are present on the map and the lines will correspond with the areas on the map where you can find the beasts. You will need to get to chapter six to achieve all the pets but many are given to you pretty early on.
In order to actually tame these pets, you must purchase the flute from the market. It’s very cheap and, again, given to you almost immediately after starting the game. Purchase it and you’ll have to play these notes four times with the corresponding beast to tame them.
Okay, Let’s Play!
Beat the final boss using only beginner armor and weapons
Here are my stats directly before beating the boss.


Short Version
- Maximize training in Soulcery, Ranged, and Defense.
- Utilize Soulcery rings, increased health for pet, and inc. chance for mega.
- Plug points into Soulcery skills as well as dodge, health, and shield.
- Level up Turgon as he has the highest base health and power.
- Always bring a companion with you.
Long Version
The reason we choose Soulcery is because it has the highest damage without needing equipment. It also buffs the damage we get from Soulcery skills like Fireball and Lightning, which already have built-in damage buffs. Not to mention their super and mega counterparts.
What About Rings?
You can mix-and-match which rings you truly like but I beat Primordial with these rings:
- Soulcery
- Tamer Badge
- Captain Ring
- Master Ring
- Stone of Resilience
We use Soulcery for the obvious damage increase with our abilities. Tamer for extra survivability on our Turgon, allowing him to tank much longer. Captain and Stone for the increased chance of mega variations for abilities. Lastly, Master to boost our main damage source.
What’s the Skill Set-Up?
You can tinker with what exactly you’d like but I would highly recommend having both Altruism and Shield in the Defense tree. This allows both your heal and shield to have a chance to translate to your allies, which helps with sustaining the fight.
Shield is necessary as we need some form of damage mitigation. In the second phase of fight, you’ll notice that one of her abilities can one-shot you if you aren’t careful. Shielding us helps monumentally with this phase of the boss.
Take Omnisoul at the bottom and max it out. This is our main damage source and the reason we are able to win this fight. Use it whenever you are able to as you have a chance to cut the battle in half if you get a mega variation of it.
Grab Merciless in the Agility tree and max it. This gives us a massive multiplier to our Super Critical Hits, which can result in an extra couple million damage and can save you the battle if you get lucky enough.
I maxed out almost everything in the Defense and Ranged tree. The extra poison and fire damage from the arrows can give you nice chunks of damage and the Defense just allows you to utilize more blocking, which helps since we have beginner armor.
Purchase all potions from the market and use the Biboo’s Brew (Yellow Potion) to give an increase to your damage immediately before the fight. This will ensure that your opening set of abilities deals a good bit of damage before Primordial can get abilities off.
- No Longer Forgotten
- No Longer Forgotten
- Find all lost children
Endless Mode
Isn’t much to report here. Once you beat the final boss in Chapter Six, you’ll be given a boat that will allow you to access Endless Mode. Beat the stages below and you’ll get the achievements. If you’re stuck on a stage, go back and train then return.
Complete endless stage 20
Complete endless stage 40
Complete endless stage 60
Complete endless stage 80
Complete endless stage 100
Complete endless stage 120
Carved History
Complete the museum to 100%
- All Books — Purchased at Market
- All Armor, Weapons, and Bows
- All Enemy Types including Final Boss
- All Fish — Check the Collection to see how many fish you’ll need.
- All Trophies — This includes soul master in every category.